How To Do A French Braid For Beginners Step-by-Step Guide for Easy Styling
Learning how to do a French braid might seem tricky at first, but it is actually a simple skill that anyone can master with practice. A French braid is created by weaving three sections of hair together, while gradually adding more hair to each section as you go down the head. This step-by-step process helps keep the hair neat and secure, making it a popular and classic hairstyle for many occasions.
People new to braiding often wonder how to keep the braid tight and even. By starting with clean, detangled hair and working slowly while adding strands, the braid becomes easier to control. Once the basic technique is understood, it can be used to create various braid styles for both casual and formal looks.
This guide will walk through the key steps and tips needed to confidently do a French braid from start to finish. It will also cover simple ways to fix common problems and add finishing touches that make the braid last longer and look polished.
Key Takeways
- Preparing hair well makes braiding easier and neater.
- Adding hair gradually to each braid section is essential.
- Small adjustments improve the braid’s tightness and appearance.
Essential Tools and Preparation
Having the right tools and preparing hair properly makes French braiding easier and neater. Choosing the correct brush, preparing the hair to avoid tangles, and sectioning hair clearly help create a smooth braid. These steps reduce frustration and improve the final look.
Choosing the Right Brush and Comb
A wide-tooth comb is best for detangling hair without causing breakage. It helps gently separate knots before starting the braid. A fine-tooth comb or rat-tail comb is useful for sectioning hair precisely, especially near the scalp.
A brush with firm but flexible bristles can smooth hair down and remove loose strands. Avoid brushes with overly stiff bristles, as they can pull or damage hair. Hair ties or clips are also needed to keep sections separated while braiding.
Using these tools properly prepares hair to be smooth and manageable, making it easier to braid cleanly.
Preparing Your Hair for Braiding
Hair should be clean or slightly damp before braiding for better control. Dry hair with a bit of texture is easier to manage than freshly washed, slippery hair. Applying a small amount of leave-in conditioner or styling cream helps reduce frizz and keeps strands in place.
It is important to avoid too much product, as it can weigh hair down or make it greasy. Light hold styling products offer enough grip without stiffness. Working with freshly brushed or combed hair ensures each strand stays smooth while adding new sections to the braid.
Detangling and Sectioning
Start by detangling hair fully from ends to roots using a wide-tooth comb or brush. This prevents knots while braiding. Split hair into three even sections at the crown for the braid’s base.
Use a fine-tooth comb to create clean, straight parts. This helps add hair evenly as the braid grows down. Pin or clip sections aside if needed to keep hair out of the way. Proper sectioning keeps the braid tight and uniform from top to finish.
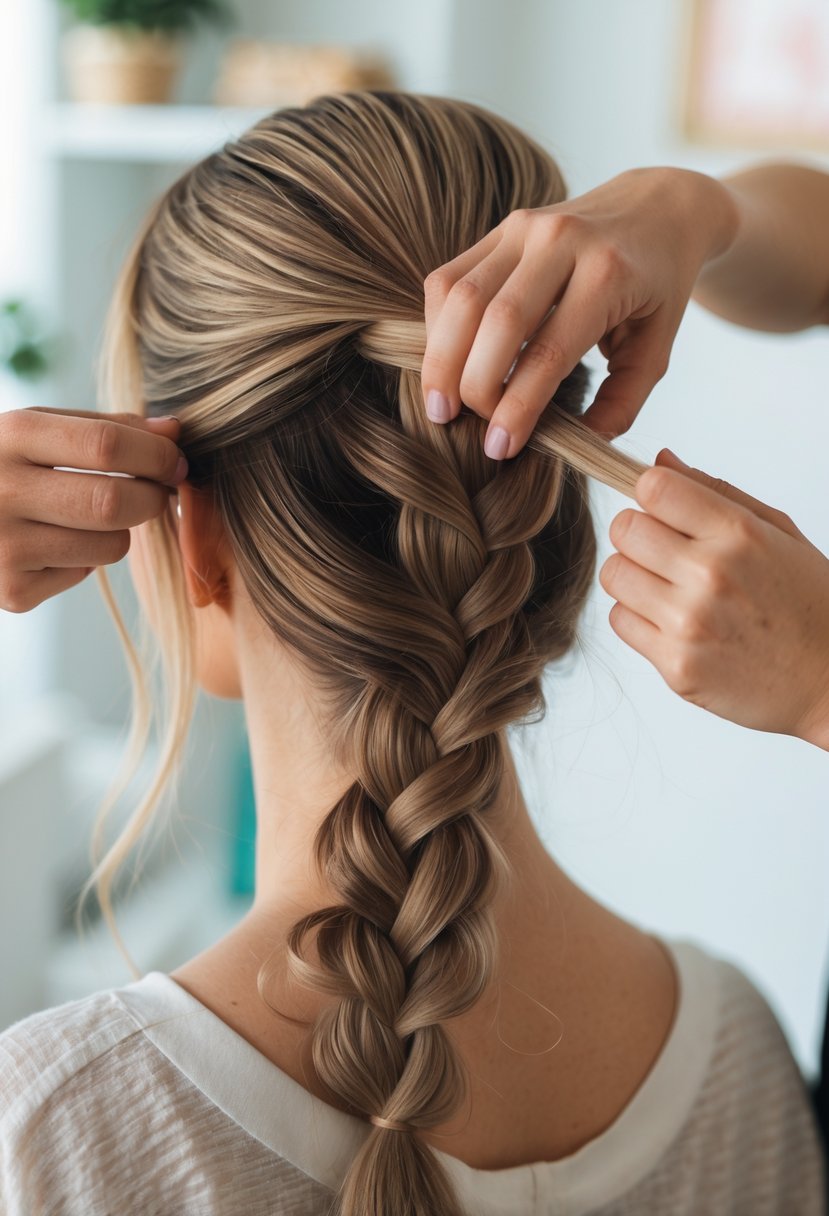
Step-by-Step French Braid Technique
The French braid starts at the crown and moves down the head. It involves adding hair gradually to the strands as the braid progresses. Keeping the tension steady is key to a neat and lasting braid.
Starting the Braid at the Crown
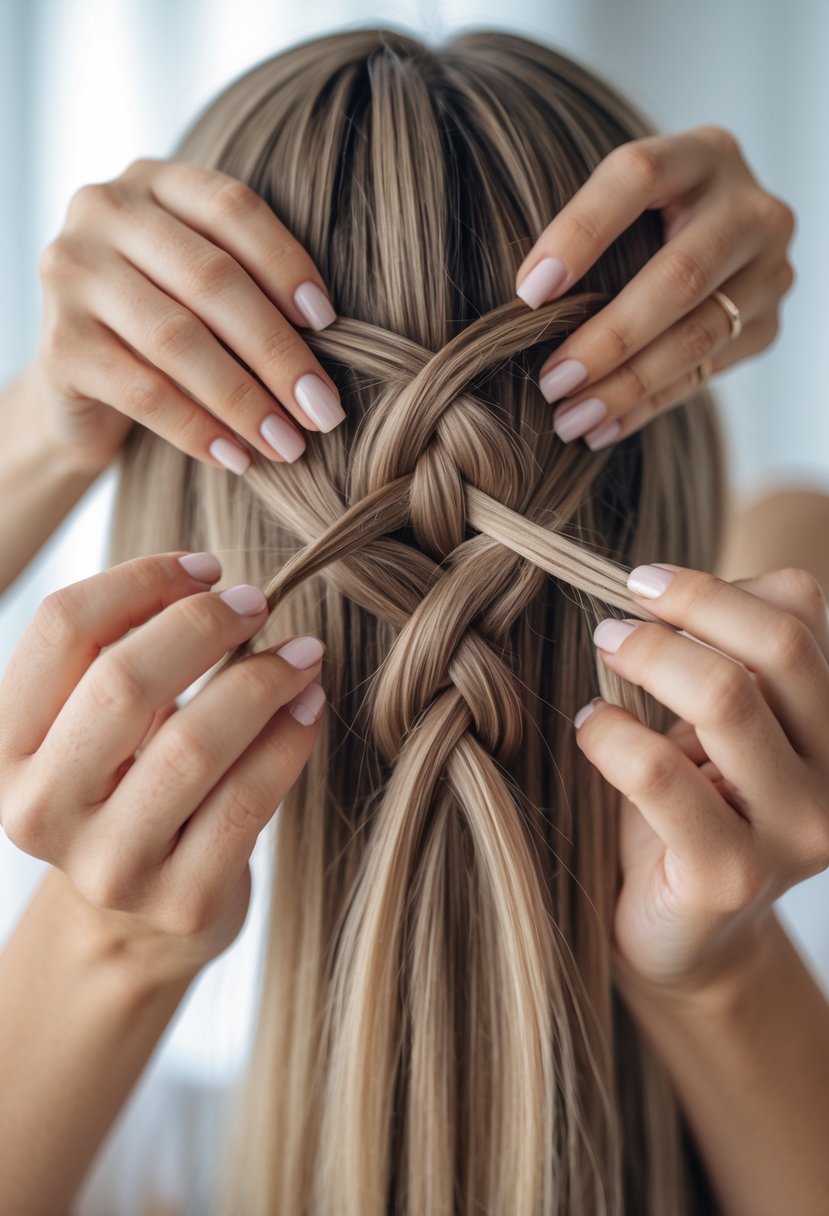
Begin by gathering a section of hair at the crown of the head. This section should be even and smooth to ensure the braid starts clean. Divide this top section into three equal strands.
Hold the strands firmly but not too tight. Cross the right strand over the middle, then the left strand over the new middle strand. This sets the basic braid pattern before adding more hair.
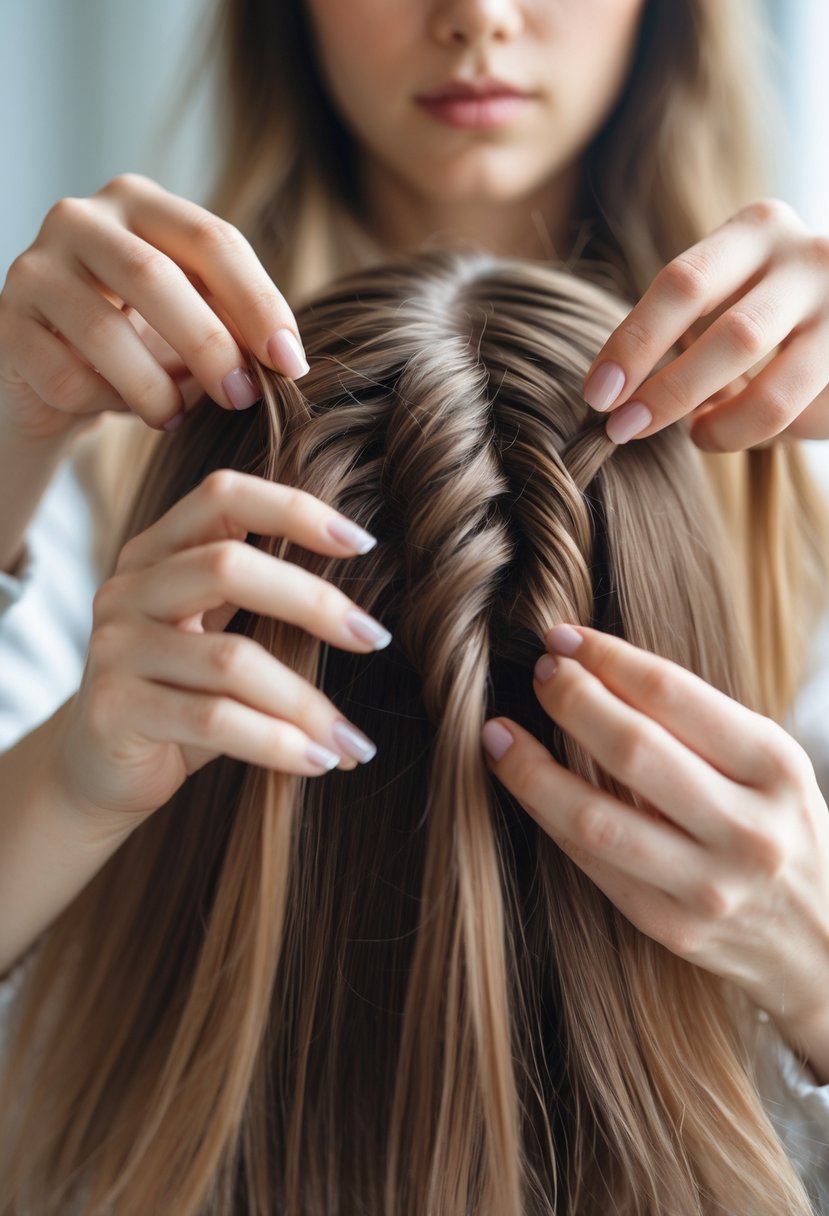
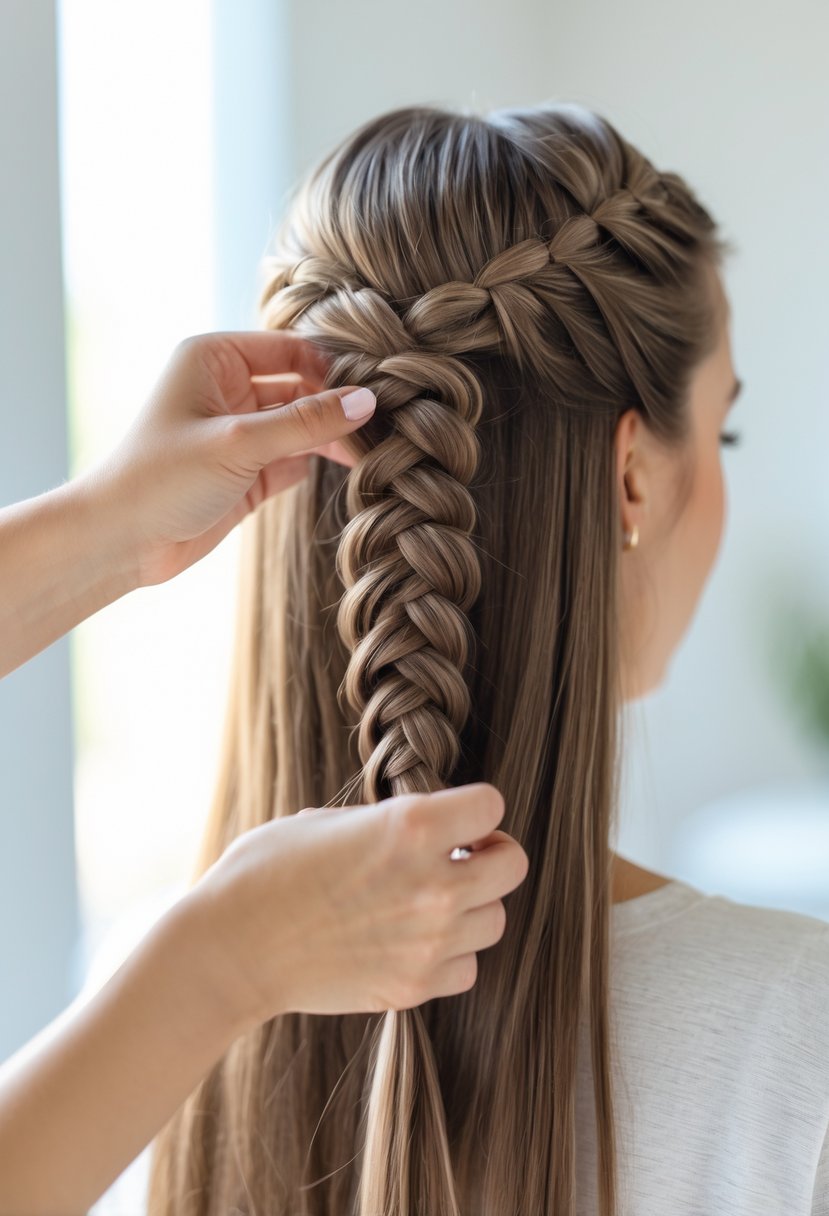
Adding Hair with Each Pass
As the braid moves down, add small sections of hair to each strand before crossing it over the middle. This pulling-in technique is what makes it a French braid and not a simple braid.
Add hair evenly from both sides for balance. It helps to sweep the hair smoothly into the braid to avoid tangles. Continue this process consistently on both sides until reaching the nape.
Maintaining Even Tension
Keeping the right tension is important for a smooth braid. Too loose may look messy, too tight can cause discomfort.
Hold the strands firmly but allow some flexibility. Keep the tension consistent with every pass to avoid uneven sections or gaps in the braid.
If the braid starts feeling too tight, relax your grip slightly before continuing. This helps maintain comfort while keeping the braid neat.
Common Mistakes and Troubleshooting
French braiding can be tricky for beginners, especially when it comes to keeping the braid tight, managing strands that slip out, and dealing with frizz. Understanding these common issues and how to fix them helps achieve a neater, longer-lasting braid.
Preventing Loose or Uneven Braids
Loose or uneven braids usually happen when sections of hair are not divided evenly or when there is not enough tension while braiding. To avoid this, it helps to start with smooth, detangled hair.
The person should hold sections firmly but not too tight to avoid discomfort.
Consistently adding hair in equal amounts as the braid moves down keeps the braid balanced.
If the braid starts to feel loose, gently pull on the finished braid strands to tighten them a bit.
Fixing Slipped Strands
Strands slipping out happens when the sections are too wide or not tightly crossed. Using smaller sections gives better control and keeps strands in place.
If strands slip, the person can stop and tuck them back into the braid carefully, then continue braiding.
Using a bit of lightweight hair product before braiding adds grip.
If many strands are slipping, it may help to braid more slowly and hold the hair tighter where the braid forms.
Addressing Frizz and Flyaways
Frizz and flyaways are common with French braids, especially on dry or textured hair. They often result from static or hair that is not fully smooth.
To manage this, a small amount of hair serum or light cream can be applied before braiding.
Using a fine-tooth comb to smooth sections right before crossing them keeps strands neat.
If frizz appears after braiding, a light mist of hairspray can help keep the style in place without stiffening the hair.
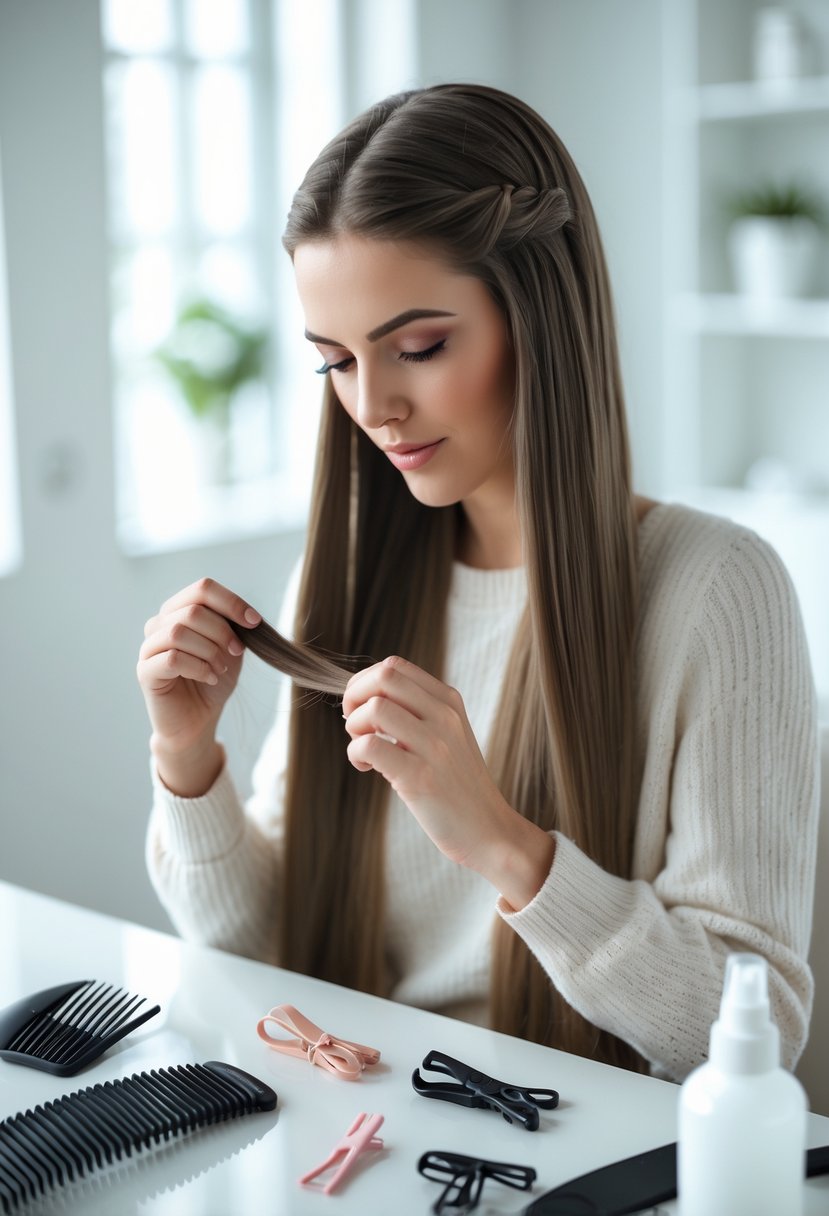
Tips for Finishing and Styling
Finishing a French braid carefully helps it last longer and look neat. Small touches with accessories or blending the braid into other hairstyles can add style and versatility. Attention to these details enhances both the braid’s appearance and comfort.
Securing the End of the Braid
To keep the braid intact, it is important to secure the end properly. Use a small elastic hair tie that matches the hair color to avoid distraction. Wrapping the tie tightly enough prevents the braid from unraveling but not so tight that it causes discomfort.
For extra hold, a little hair spray can be applied after securing the braid. This helps control flyaways and keeps the braid smooth. If the hair is slippery, a light texturizing spray before braiding can improve grip and hold.
If extra security is needed, small, clear elastics can be added along the braid or a bobby pin can be placed discreetly near the end.
Adding Accessories
Accessories can make a French braid look more polished or playful. Simple hair clips, small flowers, or decorative pins can be placed along the braid to enhance its style.
When adding accessories, it’s best to avoid heavy or bulky items that weigh down the braid and cause discomfort. Small metal or fabric accessories work well.
For casual looks, colorful hair ties or ribbons tied at the end add a fun touch. For formal occasions, metallic clips or pearls create an elegant effect.
Transitioning to Other Hairstyles
A French braid can be a starting point for many hairstyles. Once a braid is done, it can be turned into a bun by wrapping the braid around itself and securing with pins.
It can also be tied with loose hair for a half-up style, giving a mix of neatness and softness. Another option is to loosen the braid slightly by pulling the sides gently for a fuller, more relaxed look.
This versatility makes the French braid functional throughout the day, whether for sports, casual wear, or events.
Frequently Asked Questions
French braiding involves dividing hair into sections, weaving them together while adding strands gradually. Keeping the braid tight and consistent helps make the style last longer and look clean.
What are the basic steps to creating a French braid for a beginner?
First, the hair should be brushed thoroughly to remove any knots. Then, a top section near the forehead is divided into three equal parts. The braid begins like a normal braid by crossing the right strand over the middle, then the left over the middle.
As the braid continues, small sections of hair are added from the sides into the three strands before crossing them over the middle. This process repeats while moving down the head until no hair is left to add. The braid finishes with a simple three-strand braid and is secured with a hair tie.
What are some tips for making a French braid look neat and tidy?
Start with dry hair to reduce breakage and make braiding easier. Using a comb to make clean, even sections helps keep the braid smooth.
Maintaining consistent tension is important. The strands should be pulled tight but not too tight. This keeps the braid secure and prevents it from loosening as the day goes on.
If needed, small hairs can be smoothed with a bit of styling product or hairspray. This helps control flyaways and gives the braid a polished look.